At present we have some virtualization platforms which are intended to help us to prevent errors in production environments because thanks to this technology we avoid situations or achieve advantages such as:
- Unexpected errors such as shutdowns or restarts in the execution of operating systems.
- Failures with the installation of applications or programs.
- Knowledge of new features and functions of both systems that are launched either officially or in beta.
- Modeling tests of network architectures and many more functions
As a general rule, all virtualization applications offer us these advantages and one of the best known is Hyper-V which is integrated in the system which is disabled by default, for activation we can visit the following link:
Hyper-V has been developed as a hardware virtualization product created by Microsoft through which it will be possible to create and execute a software version of various systems which we know as a virtual machine, there, each virtual machine fulfills all the tasks of a team physical as they are:
Virtual machine tasks
- Execution of an operating system, applications and programs.
- Access to the resources of the physical machine.
- Interaction between the physical and virtual equipment and more actions.
When making use of virtual machines, we acquire a great advantage as it is the saving of resources, money and a greater flexibility than using a physical equipment.
Hyper-V will execute each one of the virtual machines created in its own isolated space, with which it will be possible to run more than one virtual machine in the same hardware simultaneously.
With Hyper-V it will be possible
- Establish or expand a private cloud environment.
- Make use of the hardware in a more effective way.
- Establish or expand a virtual desktop infrastructure (VDI).
- Improve safety and productivity levels
The virtual machines that Hyper-V allows us to create are
- Debian virtual machines on Hyper-V
In this context, the developers of the operating systems periodically launch new updates or beta versions of their systems which are useful for a virtual environment since they are unstable versions which can cause a series of errors , one of the most used distributions and known is Ubuntu 19.04 which is scheduled for release in the month of April 2019.
features
Ubuntu 19.04, called Disco Dingo, has features such as:
- Steam available as a Snap application.
- Chromium integration as an alternate browser.
- Python integration 3.7 as the default version of the Python3 language.
- New Yaru theme which supports more applications.
Ubuntu 19.04 is available for download at the following link:
Ubuntu 19.04
Next, TechnoWikis will explain how to create a Ubuntu 19.04 virtual machine in Hyper-V.
1. How to create virtual machine in Hyper-V in Windows 10
Step 1
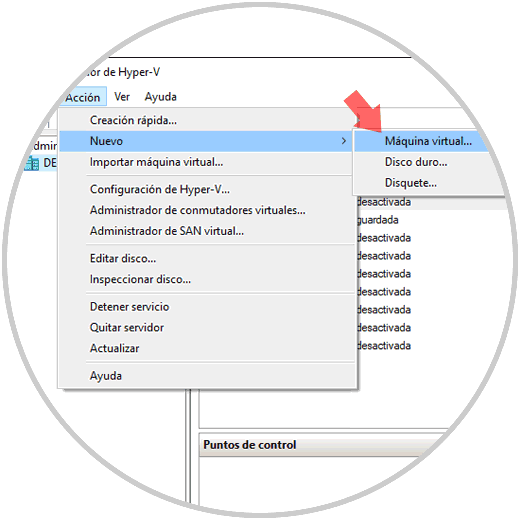
To create our virtual machine in Hyper-V we have several options such as:
- Go to the Action menu and select the option New / Virtual machine.
- Click on the New / Virtual machine button located in the Actions section on the right side.
- Right click on the physical equipment and there select the option New / Virtual machine.
Step 2
The following wizard will be displayed:

Step 3
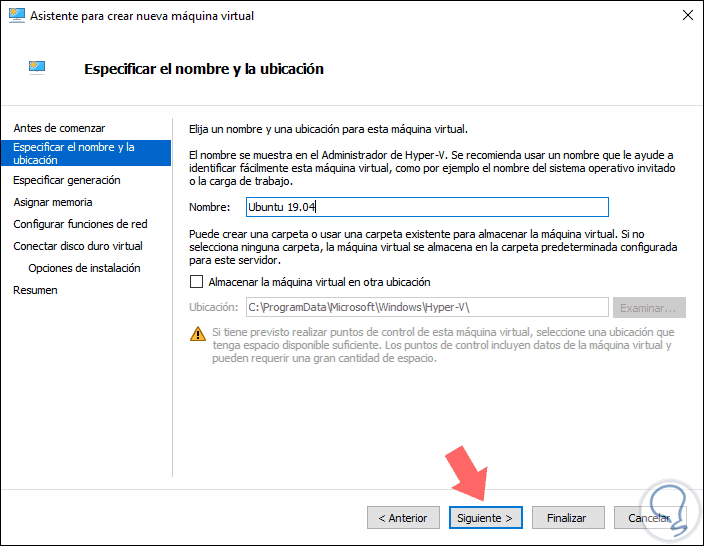
There we find a brief action of what Hyper-V can do, we click on Next and then we can enter the name of the machine to be created, as well as assign a new location if we want:
Step 4
We click on Next and in the next window we define the generation of the virtual machine, the main difference is that generation 2 only supports 64-bit operating systems and is based on UEFI which can affect older equipment, so we select the Generation 1:

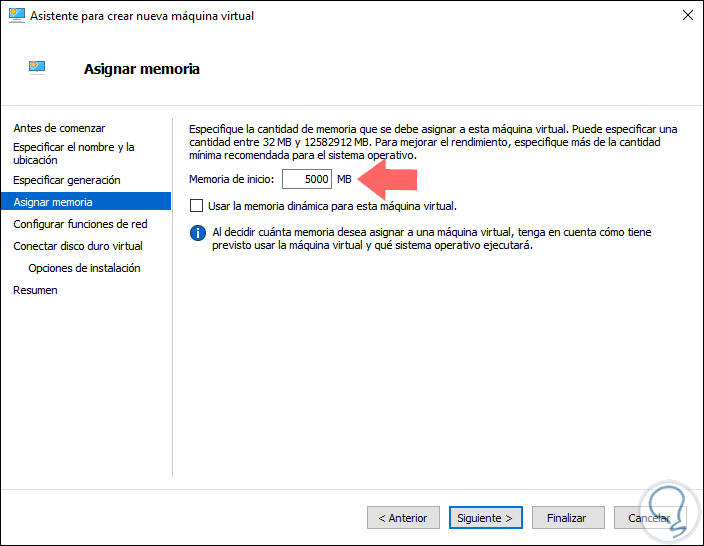
Step 5
Click on Next and now define the amount of RAM to assign:
Step 6
In the next window, we select the network adapter to which the virtual machine of Ubuntu 19.04 will connect, to allow the virtual machine to establish communication with the external network we must create a virtual switch for it:

Fields to be filled
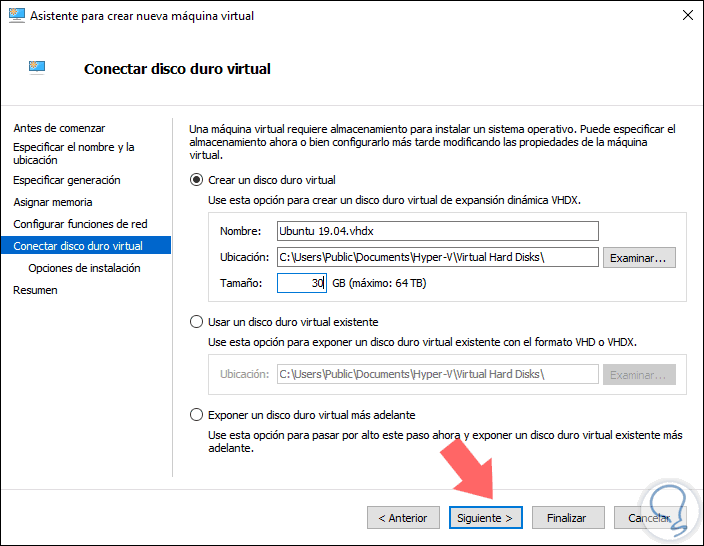
Again click on Next and in the next window we will define the following:
- Name of the virtual hard disk.
- Location where the virtual hard disk will be stored.
- Size of the virtual hard disk.
- Make use of an existing virtual hard disk.
- Do not use a virtual hard disk for later configuration
Step 7
Where to install Ubuntu
Defined that we click Next and now we will define the form from where to install Ubuntu 19.04, the options are:

Step 8
In this case we select the option File of image (.iso) and we will look for the downloaded ISO image, once we achieve this we click Next and we will find a summary of the configuration that has to be made of Ubuntu 19.04:

Step 9
Click on Finish to complete the process and create the virtual machine of Ubuntu 19.04:

Step 10
We will see the configuration of each component. When this process concludes we will see the following:
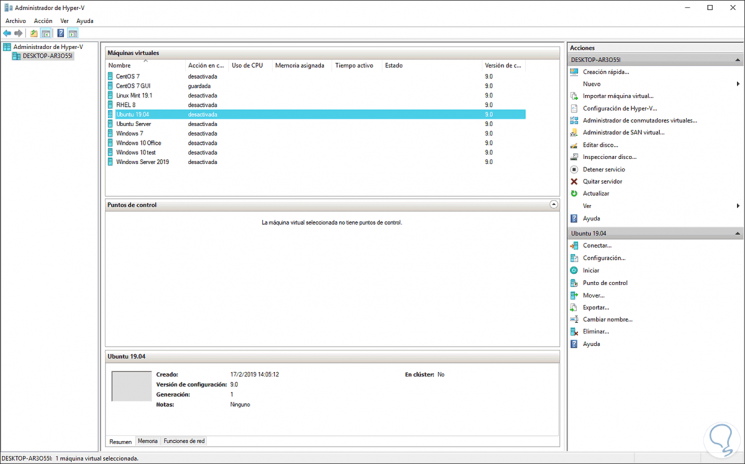
2. How to run the Ubuntu 19.04 virtual machine on Hyper-V
Step 1
To execute this process we have the following options:
- Click on the Connect button located on the right side section
- Go to the menu Action / Connect
- Right click on the virtual machine and select Connect
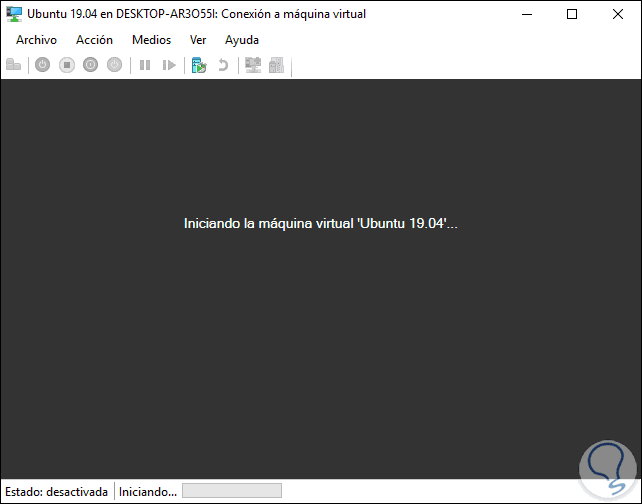
When we use any of these options, the following will be displayed:

Step 2
There we click on the Start button to start the process of configuring the virtual machine with Ubuntu 19.04:
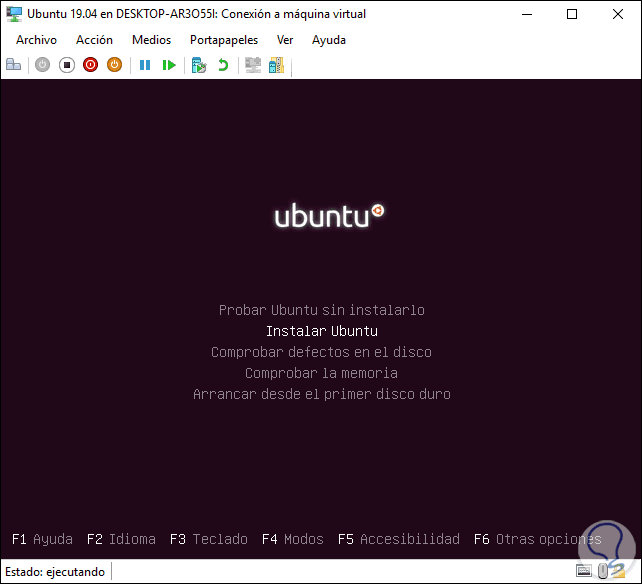
Step 3
This will redirect us to the next window where we select the language to use:

Variables
In the following window we can define the following variables:
- Try Ubuntu 19.04 din your installation is necessary, this allows you to know your environment, but not save any changes.
- Install Ubuntu 19.04 on the local disk.
- Check and analyze defects in the hard disk.
- Boot from the first hard drive which allows to use a previous installation of Ubuntu.
Step 4
Select the Install Ubuntu line and the following will be displayed:

Step 5
There we click on Continue and now we will define the keyboard language:

Step 6
Next, we select the type of installation to be made and we can add third-party software and drivers if we want to:

Hard disk options
Click on Continue and now access the options of the hard drive where we have options such as:
- Delete the disk and install Ubuntu 19.04 directly.
- Encrypt the partition where you have to install Ubuntu 19 to increase security levels.
- Use LVM (Logical Volume Management) in order to implement it in the management of the logical units.
- More options where it will be possible to manage the partitioning manually.
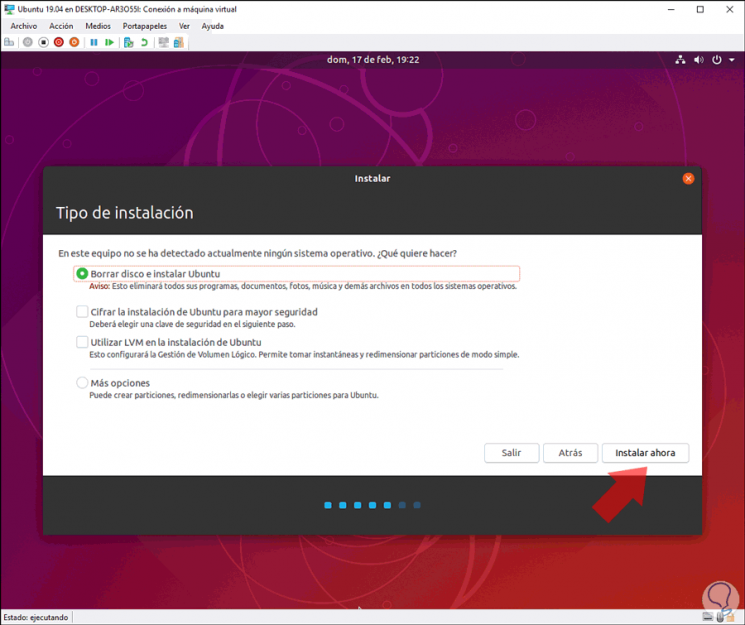
Step 7
We select, in this case, the default option and when clicking on the Install button, the following will be displayed:

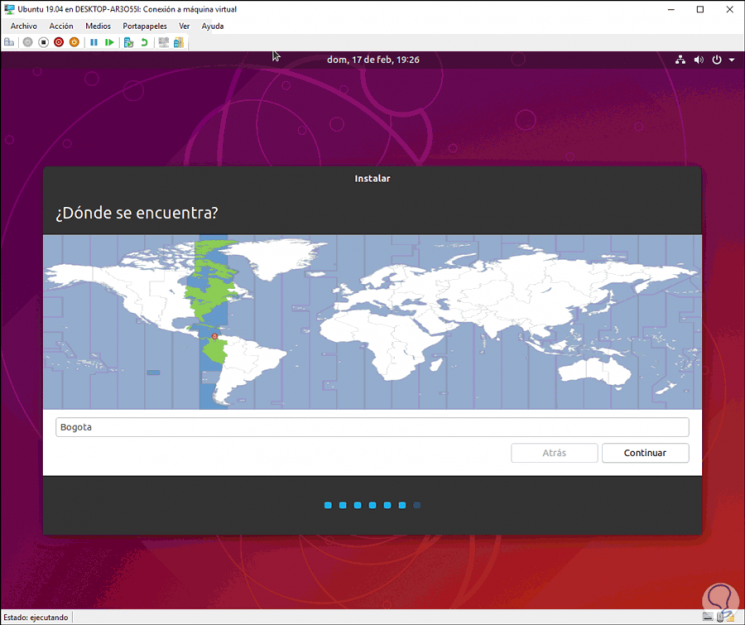
Step 8
Click on Continue and now we select our geographical location:
Step 9
Click on Continue and now enter username and password to use for access to Ubuntu 19.04:

Note
We can activate the Automatically sign in box to avoid entering the password.
Step 10
We click on Continue and the process of installing and configuring Ubuntu 19.04 in Hyper-V will begin:
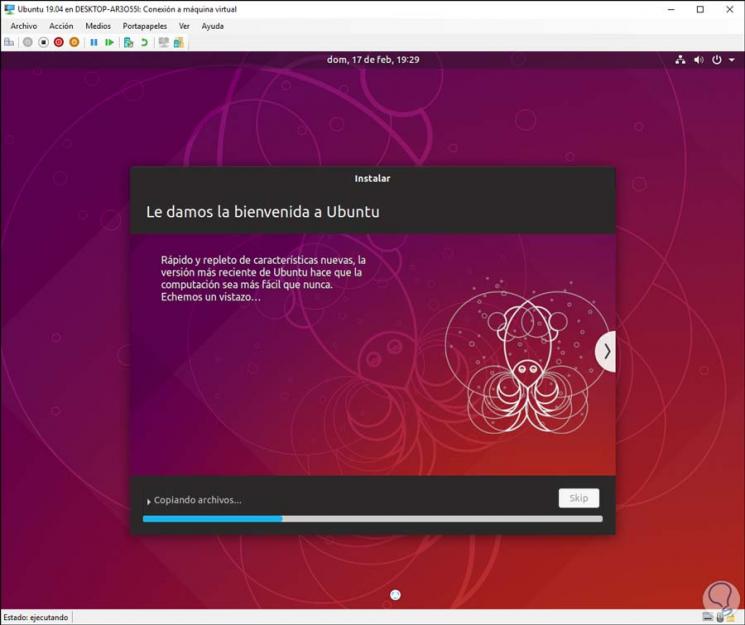
Step 11
When this process is finished we will see the following:

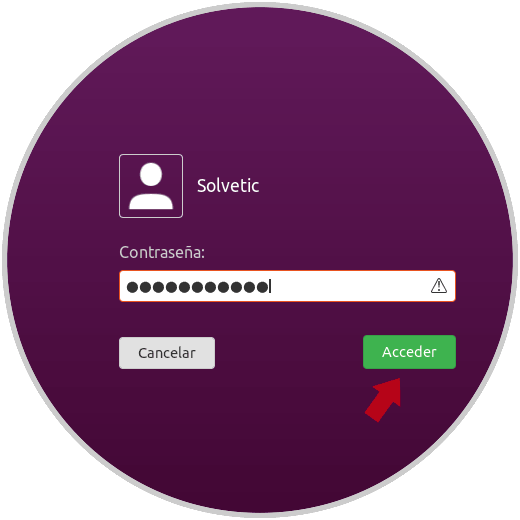
Step 12
There it will be necessary to reboot the system to complete the installation process and after that we can enter with the credentials that we have configured during the initial process and later when accessing Ubuntu 19.04 it will be necessary to perform some internal configuration of accounts and other parameters.
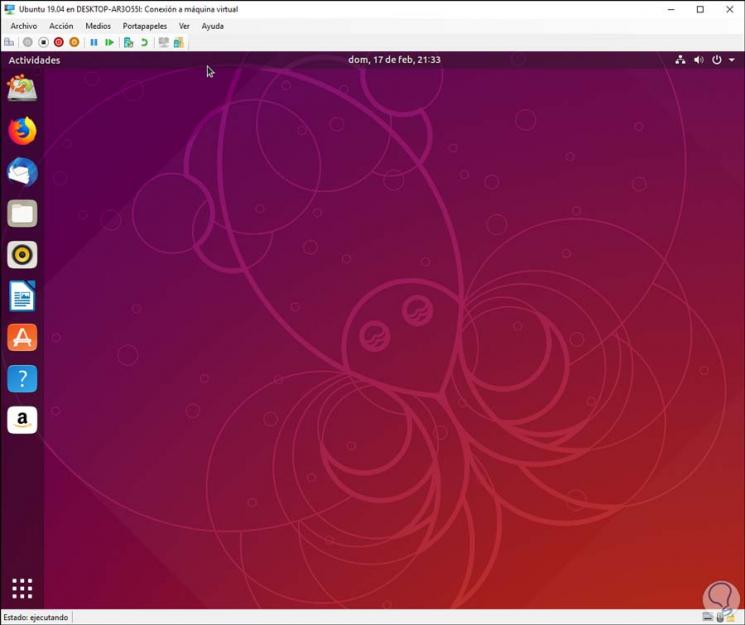
Step 13
After this it will be possible to access all the features that Ubuntu 19.04 offers us:

Step 14
The general context of Ubuntu 19.04 is as follows:
Hyper-V allows us to perform some special actions to enjoy a better experience, for this we must enable the improved session which we explain in detail in the following link:
Enable enhanced Hyper-V session
Thus, we have learned to install this new system that we will soon see officially, but from now on we can thoroughly understand each of its features and functions that it offers us and thus be prepared for everything that comes.